How I Created My Mobile Studio
I made a post a couple of months ago titled I Don’t Want a Traditional Studio Anymore that was about my desire to move away from being physically tied to my home studio space. I had realized that I would never be able to maximize my creativity as long my creative output was tied to being in my studio. I don’t resent my studio space–it has allowed me to make a lot of great music–it just doesn’t allow me the flexibility I would like to have in creating music.
That realization was the catalyst for the mission I have been on for the past two months: to create a mobile studio setup that allows me to create music anywhere I may be. I am happy to say that I’ve completed that mission. I now have a mobile studio setup that I am very happy with. In this post, I will detail what I’m using for those that are interested in trying the same thing.
Part One – The Software
The first thing I had to do was decide what software I was going to run. In my basement studio I’ve been making beats with Reason for the past seven years, but I decided to switch over to Ableton Live for my mobile setup. There are a lot of reasons for this switch (which I will make a separate post about), but the main reason was that I felt Ableton was the most all-inclusive solution for my style of production. My basement studio setup involved a lot of different applications and hardware pieces, which often resulted in a disjointed workflow and slowed down the music-making process. Switching over to Ableton Live allowed me to streamline my process and do almost everything in one program. A friend installed a copy of Ableton on my laptop three years ago that I never really used, so fortunately I already had it.
The second change was that I no longer use Cubase for recording vocals on my mobile setup. I actually really like Cubase, but using it on my mobile setup was more trouble than it was worth for a couple of reasons:
1) Transferring the License – For whatever reason, I could not get my cubase to recognize the sofware license that I purchased on my mac. It was installed on my PC several years ago and I still have all of my documentation, but their website wouldn’t recognize it on my Macbook. I seriously spent at least a week trying to get cubase to work without success. Then I tried to install my protools on my laptop, with the same problems. After a while you just give up.
2) USB Ports – Being unable to get my licenses for Cubase and Protools to work made me realize one obvious thing I had overlooked–I didn’t have enough USB ports to do it anyways. I know I can get a USB hub, which I have, and make it work, but the problem is a matter of inconvenience. Who the hell wants to plug in a USB license key every time they do music? Not me. My keys stay plugged into their ports in my old studio, but that’s not a reality in a mobile setup. Plus, what happens if I’m traveling and lose my USB key? All the sudden I can’t do music anymore. I came to the conclusion that I didn’t have the patience for that on a mobile setup; I wanted to be quick and efficient.
As a result, I abandoned Cubase and Protools and I now use Reaper for recording vocals on my mobile setup. A friend recommended Reaper to me a year ago, but it never really made sense before. I’ve been using it for the past couple of months and you can’t get much more bang for your buck. It’s easy to use, has a gang of features that pro tools and cubase don’t have, and it’s only $60. Plus, you don’t need to occupy a USB port with the license key. Naturally, there are a couple of things about Reaper I’m not happy with, but overall it was the clear choice. I had to rock with it.
Part Two – Hardware
Choosing the right hardware took a little bit more strategy because I was concerned not only with whether something did the job properly, but also with whether it was small enough to fit into my bag. Space was very important.
Here is a list of the hardware pieces I chose and why I chose them.

Sennheiser 380 Studio Monitoring Headphones ($200) – Having a mobile setup meant that I would be in many situations where I didn’t have access to studio monitors for mixing my music. As a result, I needed the ability to put together decent mixes without them. I looked at a lot of studio monitoring headphones and got a lot of recommendations from friends, and the Sennheisers seemed to be the best choice. Another small feature that put them over the top was the fact that they were foldable and came with a really nice carrying case. Without the ability to store them properly they would end up getting broken with all the traveling I do.

Focusrite Saffire Pro 14 Audio Interface ($250) – I first had the thought of going to a mobile setup about five years ago. So I went out and bought a USB interface in the $100 range. I figured it would be a good way to record vocals while I was out touring. What I found out was that latency was a big problem and the interface I bought wasn’t going to do the job. So I took it back (and ate the 15% restocking fee), then bought another one in the same price range by a different brand. Same results. I eventually realized that the problem was that the USB audio interfaces in the $100 dollar range just weren’t going to cut it for me. They felt cheap (made of plastic) and had latency issues that made recording and monitoring a big problem. I decided back then that if I was going to do it again, I would go sacrifice some money for an interface in next price range and I would also get firewire instead of USB. So this time I got the Focusrite Saffire audio interface and I’m glad I did. It’s made of solid and durable metal, so you know it will last on the road. It’s Firewire, so I can save my USB ports for other things. It’s got extra inputs and outputs that I don’t even need right now, but could need in the future. Sometimes, it’s better to get a little more than you need, so you can grow into it.

There were two reasons I got this: size and knobs. The ability to assign parameters to knobs is one of the big strengths of Ableton, so I wanted to choose a small midi controller that had assignable knobs and keys. It was between this and the Akai MPK Mini. I went with the Novation, but it was really a toss up.

Desktop Mic Stand ($10)
If you want the ability to record vocals anywhere and not have to bring a full sized mic stand with you, this is your solution. Its small enough to sit on top of my audio interface and can be folded up for easy storage in my bookbag. Plus it will only cost you $10-$12.
And there you have it. I have a few other small pieces like cables and an Audio-Technica AE6100 microphone that a friend gave me that I’m using to record vocals, but that’s it really. This is the mobile setup for the time being.
As far as the results, I couldn’t be more happy with it. For the first time in my career, I’m able to be creative anytime and anywhere. The act of recording is no different than anything I do all day. I can go from answering e-mails to writing a guest verse and sending it back to somebody without leaving my seat and with no loss of momentum. It’s great, and I’ve been making more music than ever.
If any of you have any questions about anything here please hit up the comments section.
Word is Blog
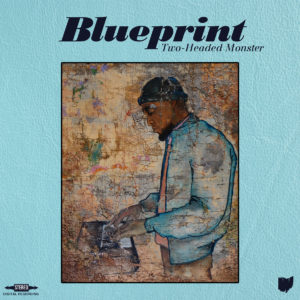
BLUEPRINTMy latest album Two-Headed Monster is out now. Order/Listen here HERE